Execute Deploy Pipeline
Execute the BuildStreaM deploy pipeline to deploy built images to cluster nodes. This procedure covers the three deploy stages, manual execution, monitoring, handling partial failures, and adding new nodes.
Overview
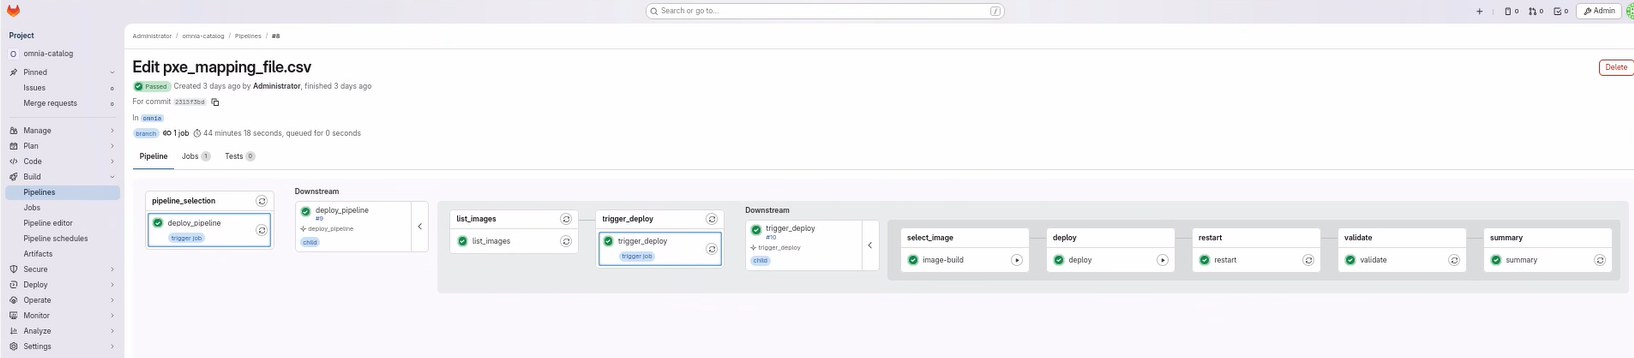
The BuildStreaM deploy pipeline automates the deployment of built images to target cluster nodes. The pipeline consists of three sequential stages:
- deploy: Deploys the built images to the target nodes
- restart: PXE-boots the target nodes to load the deployed images
- validate: Executes Molecule-based infrastructure tests to verify cluster deployment, network connectivity, and service health
The deploy pipeline is automatically triggered when you update the PXE mapping file (pxe_mapping_file.csv) in the GitLab repository, or can be manually initiated through the GitLab interface.
Warning
Do not cancel a running GitLab pipeline or stage. Cancellation prevents some pipeline steps from executing, which leaves the BuildStreaM job in an intermediate, inconsistent state.
Note
BuildStreaM does not support execution of multiple pipelines in parallel. Only one pipeline can be executed at a time. Attempting to run multiple pipelines simultaneously may result in unexpected behavior or failures.
Prerequisites
- Build pipeline has completed successfully and images are available
- Target nodes are powered on and accessible via BMC
- PXE mapping file (
pxe_mapping_file.csv) is correctly configured with target node information - PXE mapping file is present in the GitLab repository
input/folder for automatic triggering
Procedure
Trigger Deploy Pipeline Automatically
-
Navigate to the GitLab project URL:
GitLab project URLhttps://<gitlab_host>:<gitlab_https_port>/root/<gitlab_project_name> -
Update the
pxe_mapping_file.csvfile in the GitLab repository and commit the changes. The deploy pipeline triggers automatically.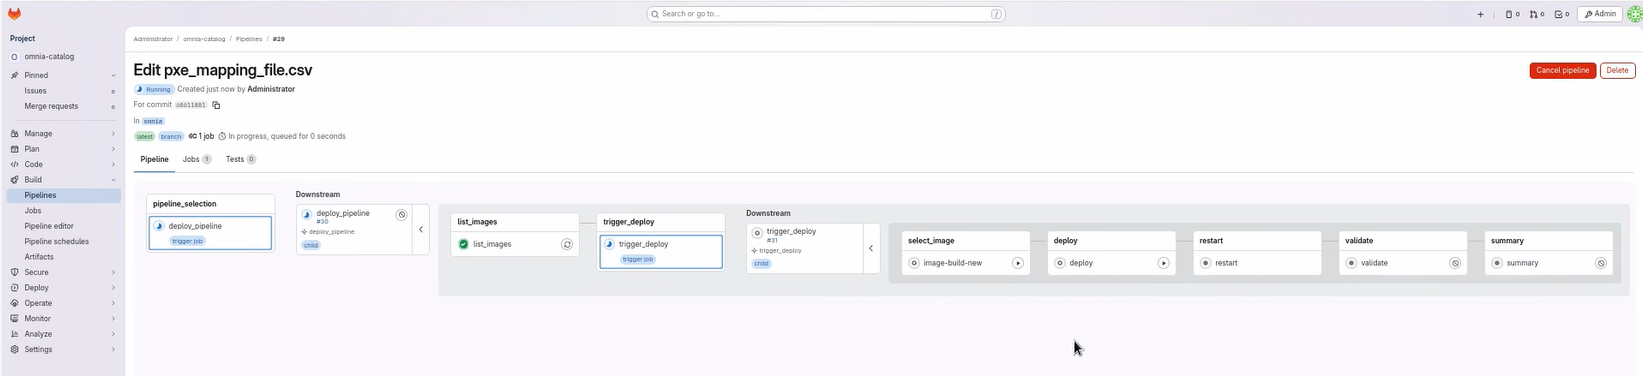
-
In the deploy pipeline, select the image from the
select_imagestage and click Play.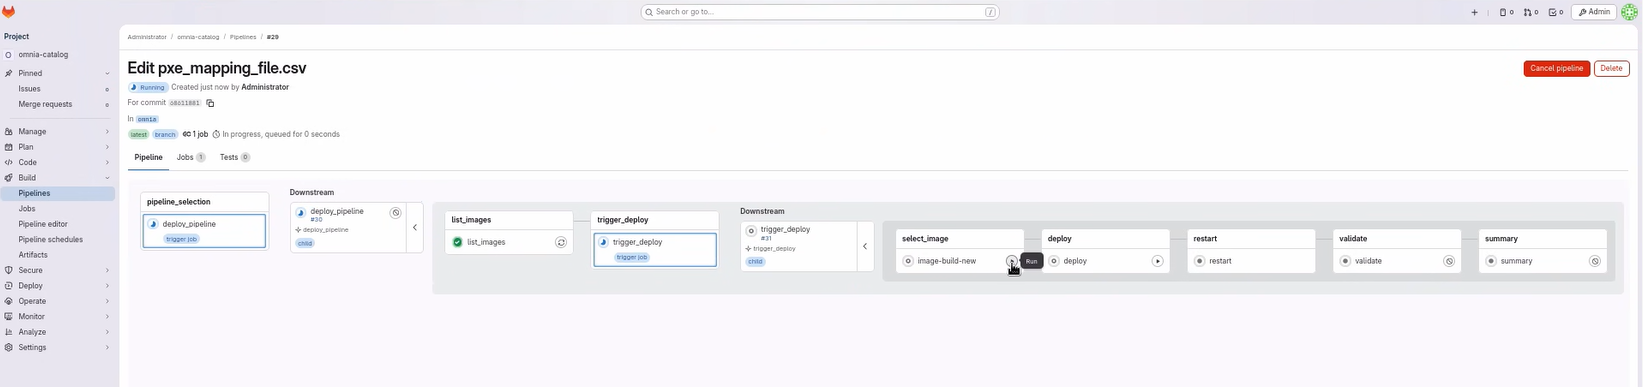
-
Click Play on the
deploystage to deploy the image.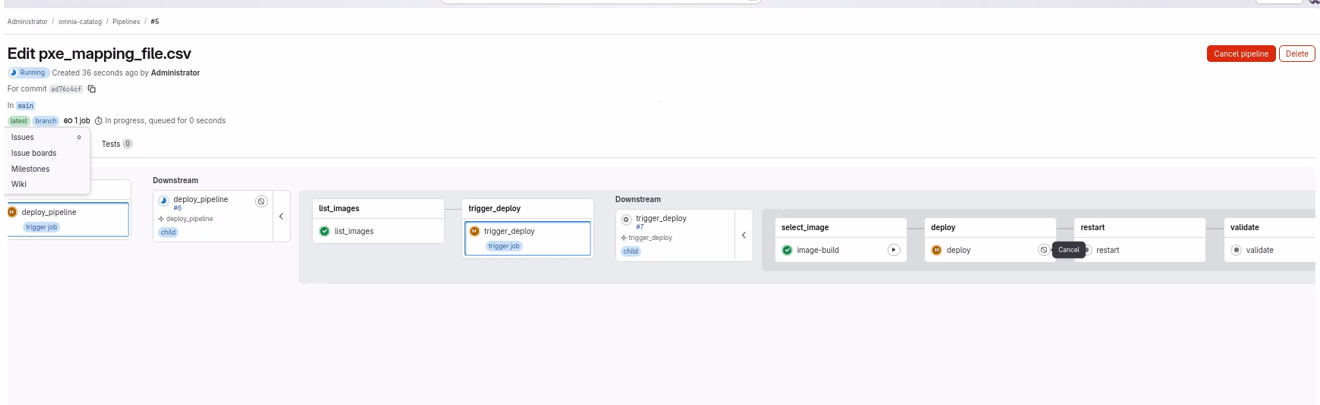
-
Monitor the pipeline progress.
Trigger Deploy Pipeline Manually
-
Navigate to Build → Pipelines.
-
Click New Pipeline.
-
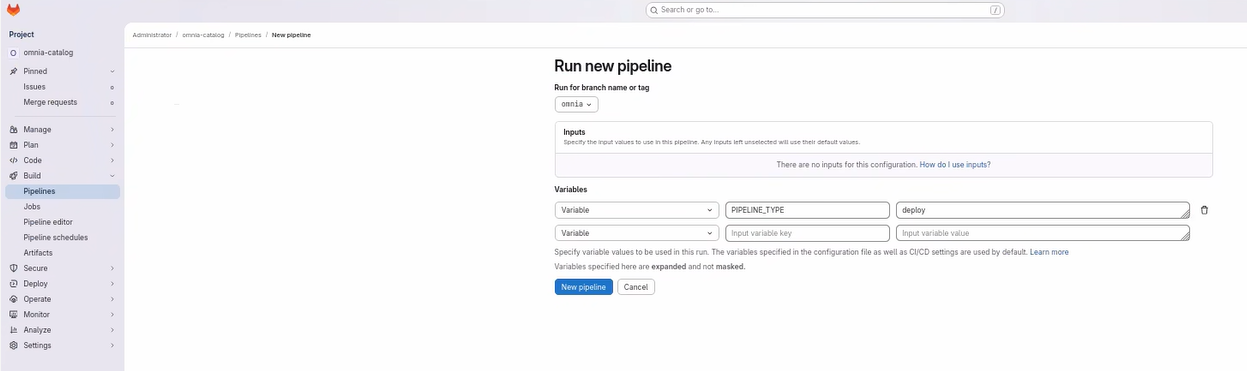
In the Run new pipeline dialog box, enter the variable name as PIPELINE_TYPE and enter the value as deploy.
-
Click Run Pipeline to execute the deploy pipeline.
Monitor Deploy Pipeline Progress
-
Click on the running pipeline to view details.
-
Monitor each stage as it progresses:
- deploy: Deploys images to target nodes based on catalog specifications
- restart: PXE-boots the nodes to load the deployed images
- validate: Executes Molecule-based infrastructure tests to verify cluster deployment, network connectivity, and service health
-
Review the stage status indicators:
- Green checkmark: Stage completed successfully
- Red X: Stage failed (click for error details)
- Blue circle: Stage currently running
-
If any stage fails, review the error logs by clicking on the failed job.
Note
The deploy pipeline uses the PXE mapping file to determine which nodes receive which images based on functional group assignments.
Add New Nodes to the Cluster
Deploy images on new nodes without affecting previously provisioned nodes:
-
Update the
pxe_mapping_file.csvfile in GitLab with the details of the new nodes. -
Run the deploy pipeline by selecting the required image.
The system PXE boots only the newly added nodes, without impacting previously successful nodes.
Handle Deploy Failures During Restart Stage
When the restart stage encounters partial failures (some nodes PXE booted successfully while others fail), BuildStreaM provides a failed_nodes.json mechanism to enable efficient retry operations.
failed_nodes.json is a structured JSON file that tracks which nodes failed to PXE boot. This file enables you to:
- Track failed nodes with detailed error messages
- Manually fix the failed nodes and update their entries as successful
- Retry only the failed nodes instead of the entire inventory
- Maintain accurate state across pipeline runs
Sample failed_nodes.json
{
  "job_id": "018f3c4b-7b5b-7a9d-b6c4-9f3b4f9b2c10",
  "stage_name": "restart",
  "timestamp": "2026-04-10T16:32:15Z",
  "total_nodes": 5,
  "failure_count": 2,
  "failed_nodes": [
    {
      "bmc_ip": "172.17.107.44",
      "hostname": "slurm-node2",
      "service_tag": "79WWJ93",
      "status": "failed",
      "message": "Failed. iDRAC is not ready. Retry again after iDRAC is ready"
    },
    {
      "bmc_ip": "172.17.107.45",
      "hostname": "slurm-node3",
      "service_tag": "79WWJ94",
      "status": "failed",
      "message": "iDRAC is unreachable. pxe boot might be set. Please check the host reboot status manually"
    }
  ]
}
Retry Procedure for Partial Failures
-
During the first run, the restart stage attempts to PXE boot all nodes automatically.
-
If all nodes succeed, the stage is marked successful and proceeds to the validation stage.
-
In case of partial failure, only failed nodes are recorded in
failed_nodes.jsonin a directory calledmiscellaneousin GitLab. The file contains failed node details along with corresponding error messages.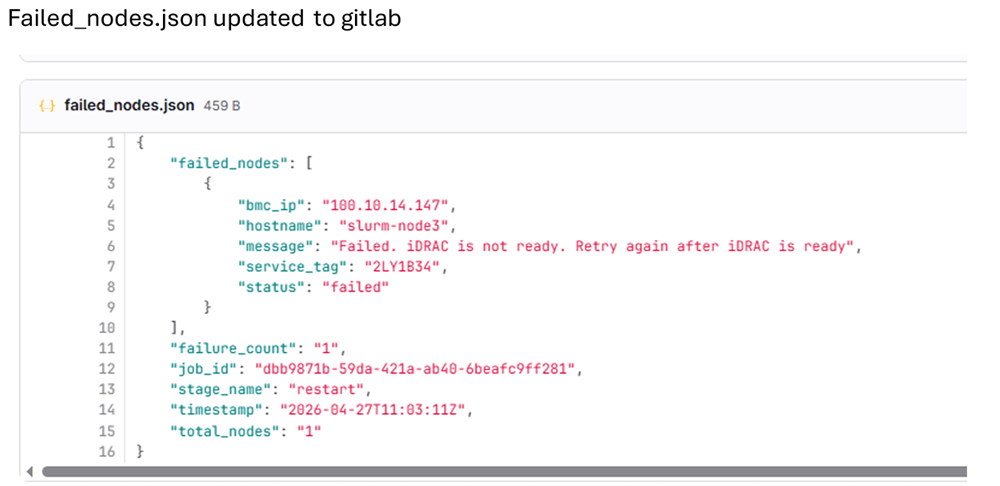
-
Analyze failures and perform corrective actions:
- Check iDRAC readiness
- Verify BMC network connectivity
- Validate PXE boot configuration
-
After resolving issues, retry the restart stage for failed nodes.
-
If automated retry is not feasible (for example, VM or manual dependency), manually PXE boot the affected nodes.
-
After manual boot of the nodes, update the node status as
successinfailed_nodes.jsonand click the Retry downstream pipeline icon to retry the failed pipeline. Updated nodes are excluded from further PXE attempts and are automatically added to the booted nodes list.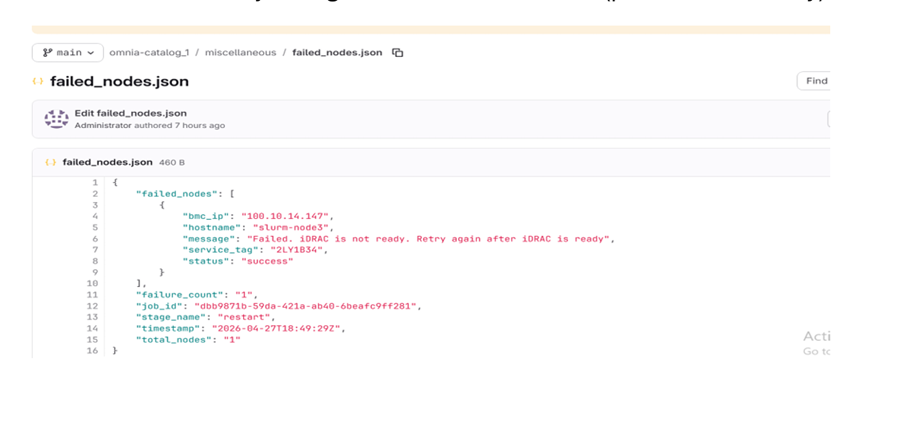
The restart stage completes successfully only when all nodes are successful (automated or manual). Upon completion, the workflow proceeds to the validation stage.
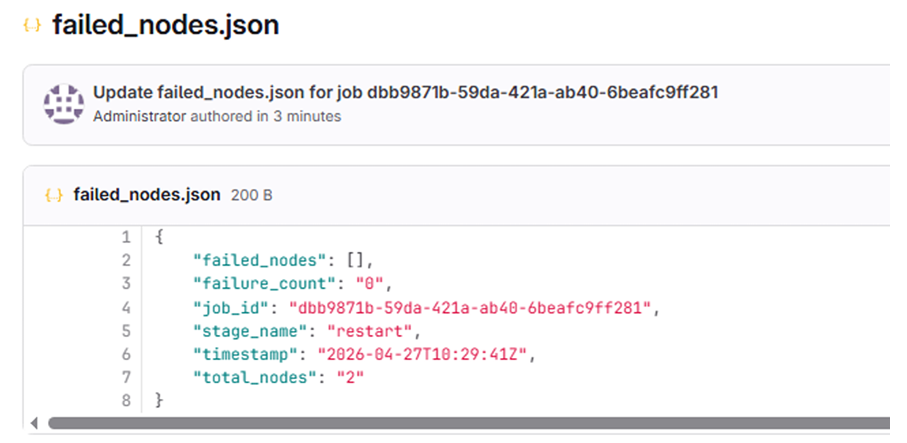
-
To view detailed logs for a validate stage, click on the Validate stage in the pipeline. Within the logs, the corresponding log file path is provided. Navigate to this path on the OIM to access the detailed test report.
Verification
After the deploy pipeline completes:
-
Check the overall pipeline status in GitLab to ensure all stages passed.
-
Verify that the target nodes have restarted and are accessible.
-
Log in to a sample of deployed nodes to verify the correct image is loaded.
-
Check the BuildStreaM API for deployment status and image group information.
Next Steps
- Cleanup Operations -- Remove old Image Groups
Troubleshooting
- Deploy stage failing: Check the log path from the API response. Ensure the functional groups in the PXE mapping file match the
catalog_rhel.json. - Restart stage failing: Verify iDRAC readiness and BMC network connectivity.
- For additional issues, see BuildStreaM Troubleshooting.